|
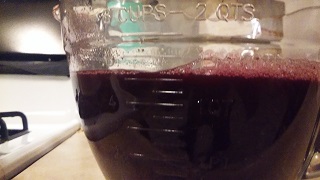
I grew up with the late-summer smell of grapes being processed into juice and jelly, and then enjoying the results the rest of the year. Nothing beats home-made grape jelly! There are lots of fond memories associated with jellymaking. You'll appreciate your mother a lot more after taking a wheelbarrow of grapes and turning it into several gallons of juice! Recently I was discussing one of my other hobbies with a lady who told me that she had never made jelly before, and wondered what it entailed. Rather than just telling her, I was about to make some jelly that evening so I took some photos as I did. I apologize for the image quality - I was making jelly while taking the photos. Some of them are a little out of focus or blurry - it's hard to stir with one hand and hold the camera steady with the other! DISCLAIMER: I'm not a chef. I don't know the right words for all the tools I use. I know what gets the job done for me. If I use the wrong word, forgive me. The photos show what I used - go by that instead. I'm starting today with grape juice that was made last September from grapes grown on the vines we planted in our back yard. Picking the grapes was a sticky, hot, delicious thing, followed by washing, de-stemming, and boiling the grapes down. The picking is easy - the rest takes several hours of hot work, followed by lots of cleaning. This is the part that gives you an appreciation for some of Mom's hard work. |
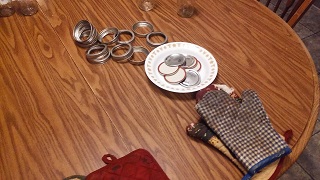
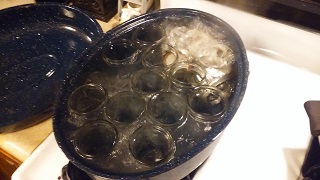
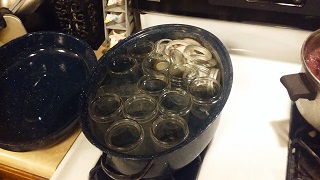 Like anything else, preparation goes a long way toward a successful experience. I start by getting the jelly jars ready. The jars are filled with water,
and placed into a roasting pan full of water. They sit on one side of the stove covered and are allowed to heat to a good rolling boil. This does two things
- 1) it makes sure they're really clean (you can use a dishwasher for this - mine was full), and 2) it makes sure they're not ice-cold when you pour the hot
juice in at the end. That could cause them to crack and spill. A dishwasher will do this heating-up too. I also put the rings and lids in to make sure
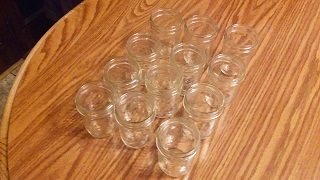
they're clean and to soften the rubber seal on the lid.. By the way, these are all 8 ounce Mason and similar brand jars from the canning section at Farm and
Fleet (best price I've found locally). I also re-use glass jars from store-bought jellies, pickles, etc. The thing to look for is that it can seal well.
Start with Mason jars - they've not failed me yet.
Like anything else, preparation goes a long way toward a successful experience. I start by getting the jelly jars ready. The jars are filled with water,
and placed into a roasting pan full of water. They sit on one side of the stove covered and are allowed to heat to a good rolling boil. This does two things
- 1) it makes sure they're really clean (you can use a dishwasher for this - mine was full), and 2) it makes sure they're not ice-cold when you pour the hot
juice in at the end. That could cause them to crack and spill. A dishwasher will do this heating-up too. I also put the rings and lids in to make sure
they're clean and to soften the rubber seal on the lid.. By the way, these are all 8 ounce Mason and similar brand jars from the canning section at Farm and
Fleet (best price I've found locally). I also re-use glass jars from store-bought jellies, pickles, etc. The thing to look for is that it can seal well.
Start with Mason jars - they've not failed me yet.
|
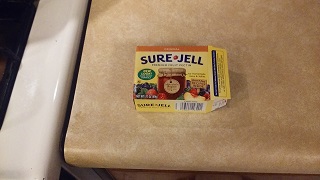
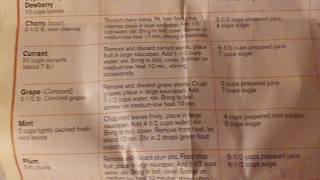
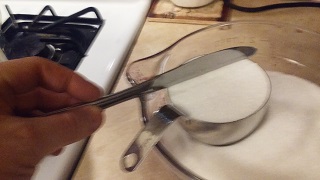
While the jars are heating up (to a rolling boil) I measure out the ingredients. According to the Sure-Jell recipe (I use the "Original" type in the yellow box), a batch of grape jelly requires 5 cups of juice and 7 cups of sugar. |
|
Measure them accurately, and especially DON'T TRY TO SKIMP OUT ON THE SUGAR! |
|
 After the jars have boiled a while, I turn off the burner and let them sit covered while I work on the juice.
|
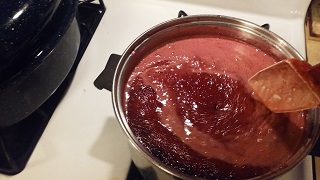
Now we start actually making jelly! Begin by pouring the measured juice into a large pan pot and heating it up. |
 After it just starts to show a little steam coming off, I mix in a single complete packet of Sure Jell slowly, stirring constantly.
|
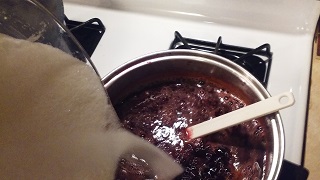 When it gets to a full boil, I slowly pour in the sugar (it takes about a minute) taking care to keep it moving. During this stage,
the juice is cooled off by the sugar so I start moving the jars from the roasting pan to the table.
When it gets to a full boil, I slowly pour in the sugar (it takes about a minute) taking care to keep it moving. During this stage,
the juice is cooled off by the sugar so I start moving the jars from the roasting pan to the table.
|
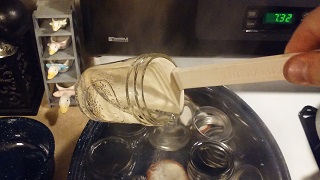 Each jar is picked up by inserting a rubber spatula in from the top and, with the spatula so it WON'T hold any liquid, I carefully pour the water out into the
pan. You don't want the hot water to splash on you! I take it to the table, pop it off, and go back to the stove. At the stove I stir the juice a little more,
then repeat draining for the next jar.
Each jar is picked up by inserting a rubber spatula in from the top and, with the spatula so it WON'T hold any liquid, I carefully pour the water out into the
pan. You don't want the hot water to splash on you! I take it to the table, pop it off, and go back to the stove. At the stove I stir the juice a little more,
then repeat draining for the next jar.
|
 I repeat this until all the jars are done, and about the same time it seems like the jelly needs more of my attention.
|
|
Set some pot holders on the table. You will be putting the hot juice pot there, and don't want to damage the finish.
|
|
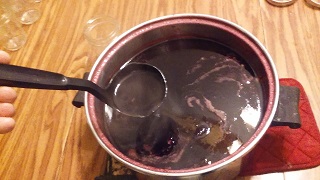
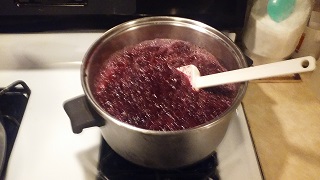
Keep stirring the jelly until it comes to a full rolling boil. You will see it froth up - keep stirring, and turn down the heat so that it doesn't overflow but still stays frothy. Set the timer as this starts for 1 minute. Keep stirring! When the minute ends, turn off the heat but keep stirring. This was a fun photo to try to take - stirring, adjusting the heat, and taking the picture with only two hands! |
|
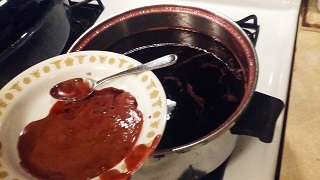
There will be a little bit of whitish "scum" that stays on top. Use a soup bowl and spoon, and probably your spatula, to collect as much of the scum as possible. You will probably get a little juice, but it should only be a spoonful after the whole pot is cleaned off. Don't fret the small loss. Set the bowl and spoon aside for now. |
|
Carefully (the juice is HOT!) ladle the juice into each jar. I take the jar over the pot, scoop several ladles-full of juice in, and set it on the other side of the table. There will be a little juice on the outside of the jar. If you use a sheet of newspaper for a table covering it will aid in clean-up. We just didn't have any this time. Fill the jars to about a half inch from the top - there's actually a line in the glass if you look carefully. |
|
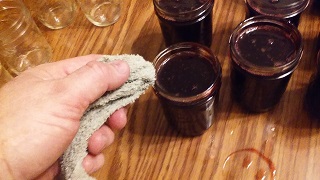
After all the jars are filled, take a hot, wet towel to the rim and threads of each glass to wipe off any juice there. If you don't, the lid may not seal well, or it may be too hard to open when the sticky juice hardens. You don't have to get it perfect - a single wipe is usually sufficient. Every three or four jars I will wash the towel in hot water and ring it out. As you wipe off the top of each jar, put on the lid and screw on the ring - not tight, but snug. Then wipe off the next jar, seal it, and repeat. After all the jars are sealed, it's time to start cleaning up. I usually put the jars back into the cardboard crates they come in so they're easy to move around. As they cool, you may hear the lids pop down. This is caused by the contraction of the cooling air and juice. This vacuum and the high heat and sugar content help to keep the jelly from spoiling. |
|
You may notice in the photo that there is a lot of juice on the top of the table. I got juice on the outside of the jar and instinctively dropped it as I was going to set it down. Because time is important, I just continued on with filling the rest of the jars and allowed the mess to solidify. When I was cleaning up at the end of the night, most of the mess came up very easily because it had cooled down so quickly. This is the first time I've ever done this, after several years. I think that's a pretty good success rate. |
|
I hope this helps you see how easy it is to make jelly, and encourages you to give it a try. Andy |